Docker Installation
The docker image is available on Docker Hub. This docker version is based on a Ubuntu 20.04 image with Python 3.10 installed. The Docker image can support GPU acceleration as it comes with CUDA 11.1 and cuDNN 8.0 installed.
Pre-requisite for installing Docker with GPU Support
For GPU support, you need to install NVIDIA Container Toolkit on your machine. The toolkit is required to run the docker container with GPU support. Follow all the guidelines in installing the necessary drivers and the toolkit for GPU support. For installing docker on your machine, you can follow the instructions provided in the Docker Documentation.
Installing FastVPINNs Docker Image
To install the docker image, you can use the following command:
docker pull thivinanandh/fastvpinns:latest
Step by Step Guide to Run the Docker Image
Create a new folder to mount the volume for the docker container. This is used to share the files between the host and the container. Lets create a folder named fastvpinns_docker_output in your home directory. We will use this file to save any files that we need to transfer back to the host system.
mkdir ~/fastvpinns_docker_output
Change the directory to the folder fastvpinns_docker_output:
cd ~/fastvpinns_docker_output
Pull the docker image using the following command:
docker pull thivinanandh/fastvpinns:latest
To run the docker container with GPU support, you can use the following command:
docker run --gpus all -it --rm -v ~/fastvpinns_docker_output:/fastvpinns/output thivinanandh/fastvpinns:latest
for CPU only support, you can use the following command:
docker run -it --rm -v ~/fastvpinns:/fastvpinns thivinanandh/fastvpinns:latest
Explanation of the command: - –gpus all : This flag is used to enable GPU support for the container. - -it : This flag is used to run the container in interactive mode. - –rm : This flag is used to remove the container once the container is stopped. - -v ~/fastvpinns_docker_output:/fastvpinns/output : This flag is used to mount the volume ~/fastvpinns_docker_output from the host system to the folder inside the docker container located at /fastvpinns/output. - thivinanandh/fastvpinns:latest : This is the docker image name and tag.
Note: Based on current code structure within the library, the outputs are confined to their corresponding output folders present within them. For Eg: if we run the cd2d problem in the uniform mesh located at /fastvpinns/examples/forward_problems_2d/uniform_mesh/cd2d/ , then the output for that run will be saved only within the folder /fastvpinns/examples/forward_problems_2d/uniform_mesh/cd2d/output. This output folder and the files within them will be deleted once the docker container is destroyed. However to keep these outputs in our host system permanently, once an example run, we can transfer the output files to the /fastvpinns/output` folder within the docker image. These files which are saved in /fastvpinns/output folder will be permanently available on the host system at ~/fastvpinns_docker_output, even when the docker container is destroyed.
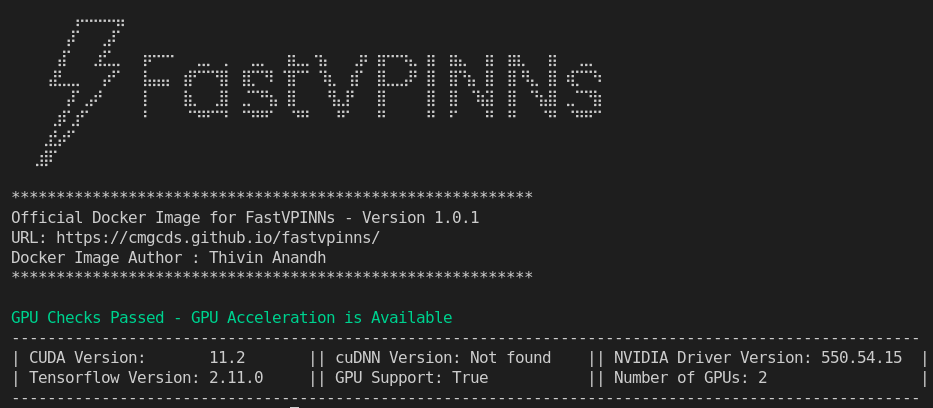
When loaded into the container, The console will look like the image shown below. Here it shows whether the GPU is detected and the version of the installed packages.
Navigate to the examples folder to run the examples provided in the repository. The Status of GPU can be viewed by running the following command:
nvidia-smi
Additional Notes
To make the experience better, you can attach the docker container to a VSCode instance. This can be done by installing the Remote - Containers extension in VSCode. This extension allows you to attach the running docker container to a VSCode instance. This way you can edit the files in the container using the VSCode editor.